Mass Reprint Labels
Reprint shelf labels or Avery barcode sheets for many inventory items — filter by category, item type, or hand-picked rows.
Open Mass Reprint Labels → Opens your members area in a new tab
Step-by-step instructions
1 Open Mass Reprint Labels
In the left sidebar, click Point of Sale → Labels & tags → Mass Reprint Labels. You can also press Ctrl+K (or ⌘+K on Mac), type mass reprint, and pick the page from Go to section.Point of Sale → Labels & tags → Mass Reprint Labels. 2 Choose how to select items
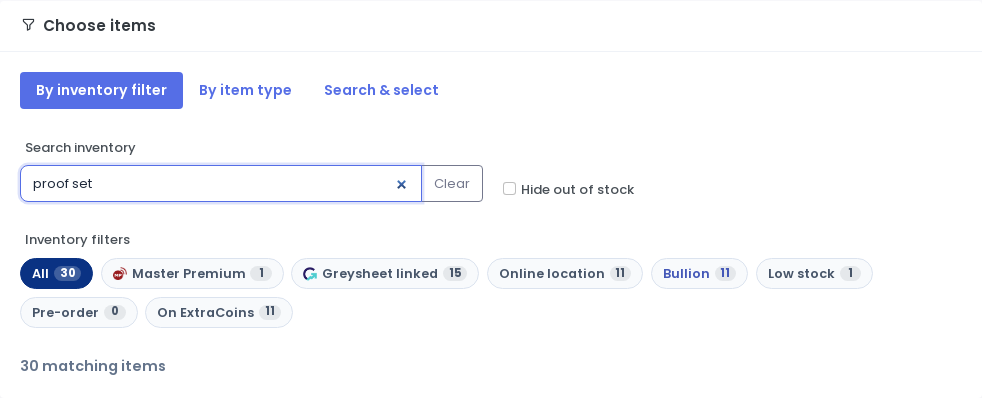
Use the tabs at the top: By inventory filter (chip row — Proof sets, Bullion, All, etc.), By item type (US Coins, World, Supplies…), or Search & select (checkboxes on individual rows). Search and filter chips update the print queue live — no Apply button.Bullion chip selected with a live search — note the match count under the chips. 3 Narrow with search (optional)
Type in the search box to match description, barcode, location, and related fields. Chip counts update as you type. If you search while a narrow filter is active, SpotPro may widen to All so results are not hidden.4 Review Items to print
The Items to print list shows what will be included in the batch. Rows marked Preview also appear in the print preview above the sticky bar. Very large filters are capped at the batch limit shown on the page — tighten filters or use Search & select for a smaller run.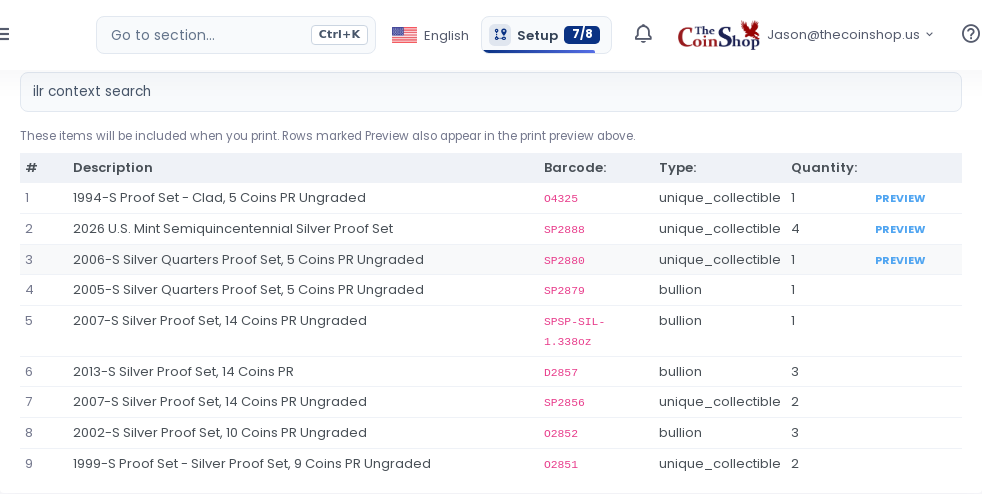
Queue rows update as filters and search change. 5 Pick label format: Custom or Avery
Under Label format, choose Custom shelf labels for your designed Label 1–4 templates (description, price line, barcode — one label per page). Choose Avery tag sheets for barcode-only grids on Avery stock — same layouts as Tag Barcode Sheets, filled with each item's existing inventory barcode.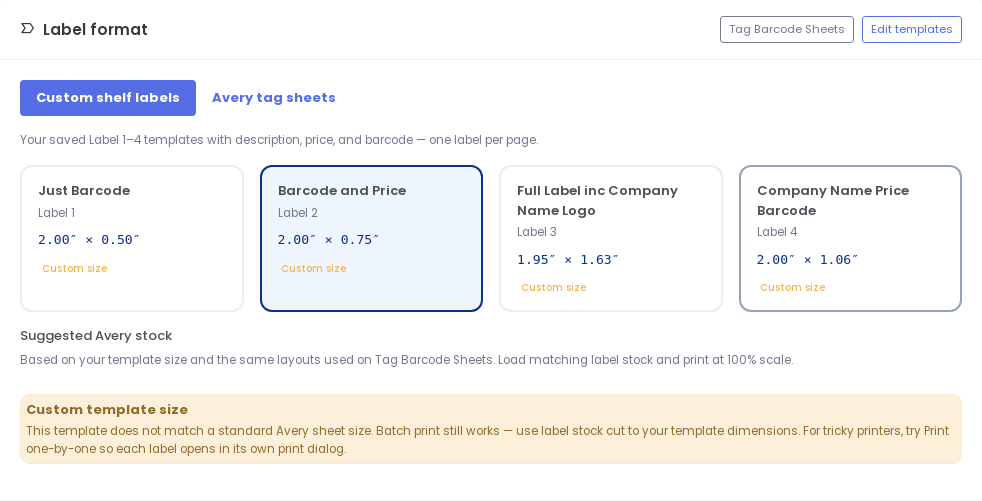
Custom shelf labels — template cards and suggested Avery stock. 6 Custom shelf labels — pick Label 1–4
Tap a template card (Label 1, 2, 3, or 4). These match the designs you saved under Point of Sale → Design Your Labels. Green Avery pills appear when your template size matches a known sheet; custom sizes show a warning — batch print still works on cut-to-size stock.7 Custom — Print batch or one-by-one
Click Print batch for one job with every selected item — fastest for standard label stock. Click Print one-by-one when your template is an odd size or your printer struggles with multi-page label PDFs — each item opens its own print dialog.8 Avery tag sheets — pick a layout
Select a built-in layout (Avery 5167 for 2×2 flip edges, 5160 address labels, etc.). The preview shows the first sheet scaled on screen. Click Print Avery sheet(s) when ready — sheet count is based on labels per sheet and item count.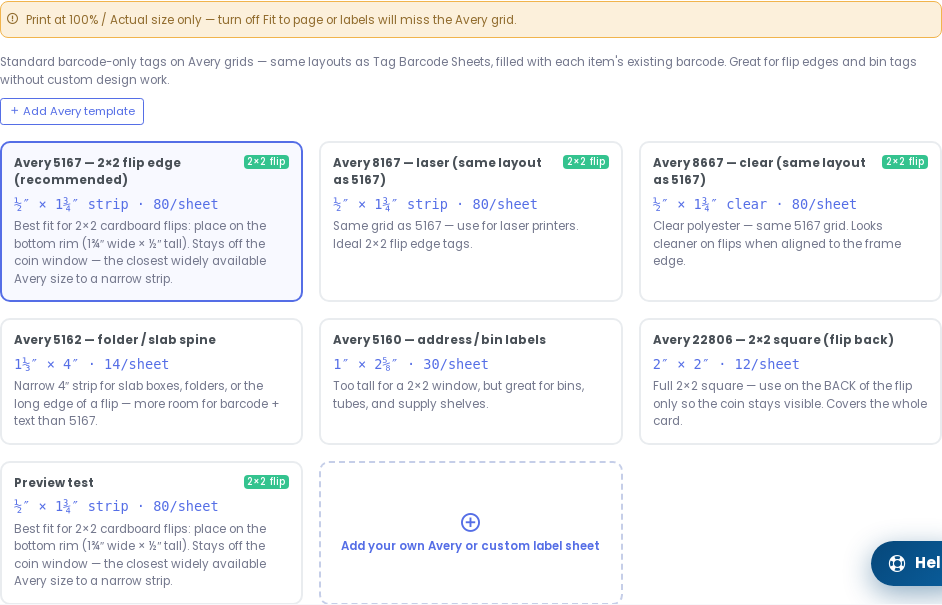
Avery layouts including Add Avery template for custom sheets. 9 Save your own Avery template
Click Add Avery template. Enter an Avery product number (5167, 8160, …) and click Look up. Recognized numbers load the correct grid automatically. If there is no match, enter label width and height in inches from your package — SpotPro auto-fits columns and rows on a US Letter sheet. Optional Advanced opens manual margin and grid controls. Saved templates show a Saved badge and stay on your account.Add Avery template button — top right of the Avery layout grid. 10 Print Avery at 100% scale
In the browser print dialog, use Actual size / 100% scale. Turn off Fit to page or Shrink to fit — otherwise labels miss the pre-cut grid. Print a test sheet on plain paper first and hold it up to your label stock before running a large batch.11 Use the live preview
The preview iframe shows the first matching items — same HTML as the print job. Click Refresh after changing filters, template, or Avery layout. Avery preview shows the first sheet only, scaled for on-screen review.
Screenshots