Finding Your Way Around
How the left sidebar is organized — Configuration, Apps, Point of Sale, Ecommerce.
Step-by-step instructions
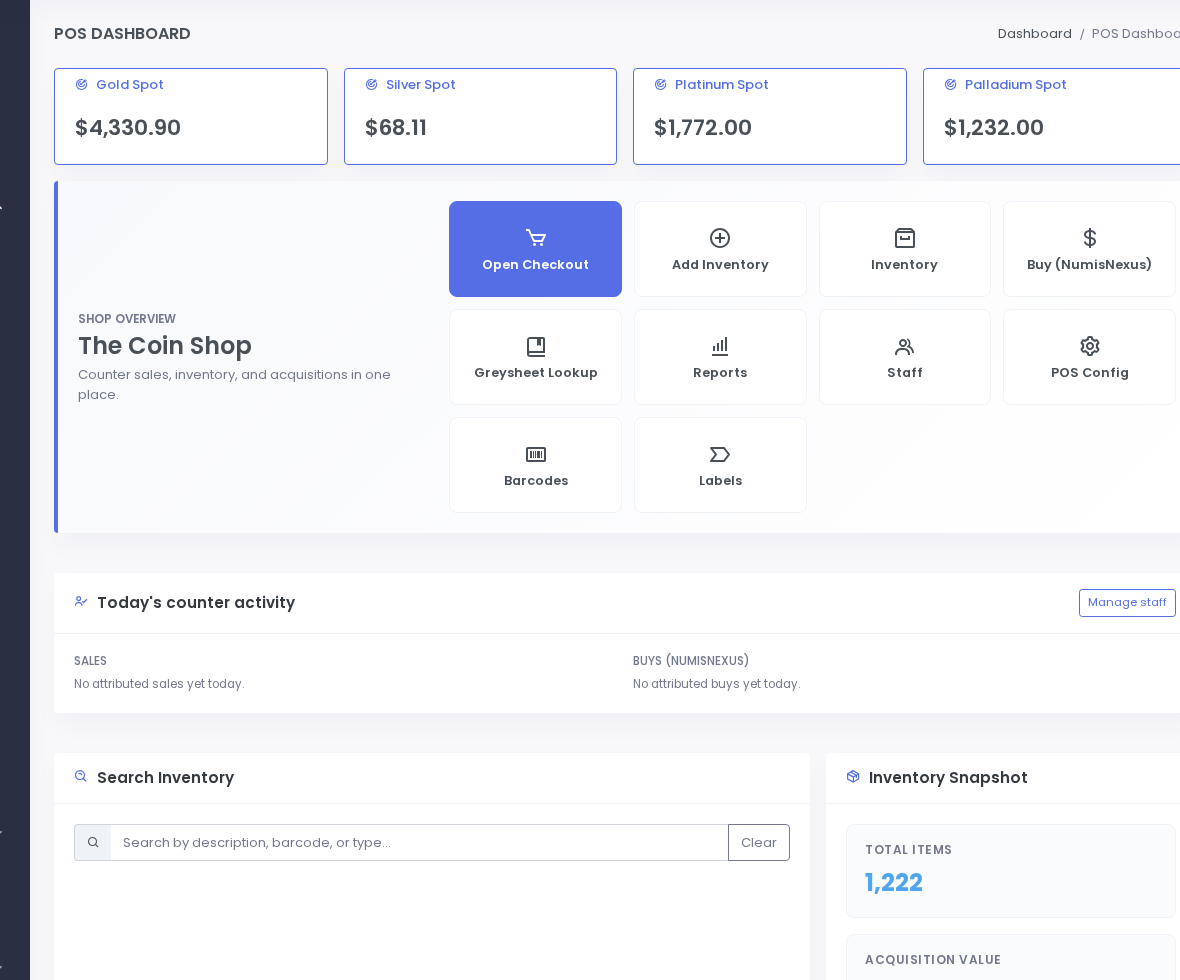
1 Dashboard (home)
Click the SpotPro logo or Dashboard at the top of the sidebar to return home. You will see spot prices, quick links, and the Setup Guide button.Dashboard — your home screen. 2 Configuration section
Click Configuration to expand it. Here you find: Company Profile, Display Screen, Scrap Gold, TEXT (SMS) Messaging, Web Designer Tools, and Point of Sale Config. Set these up before going live.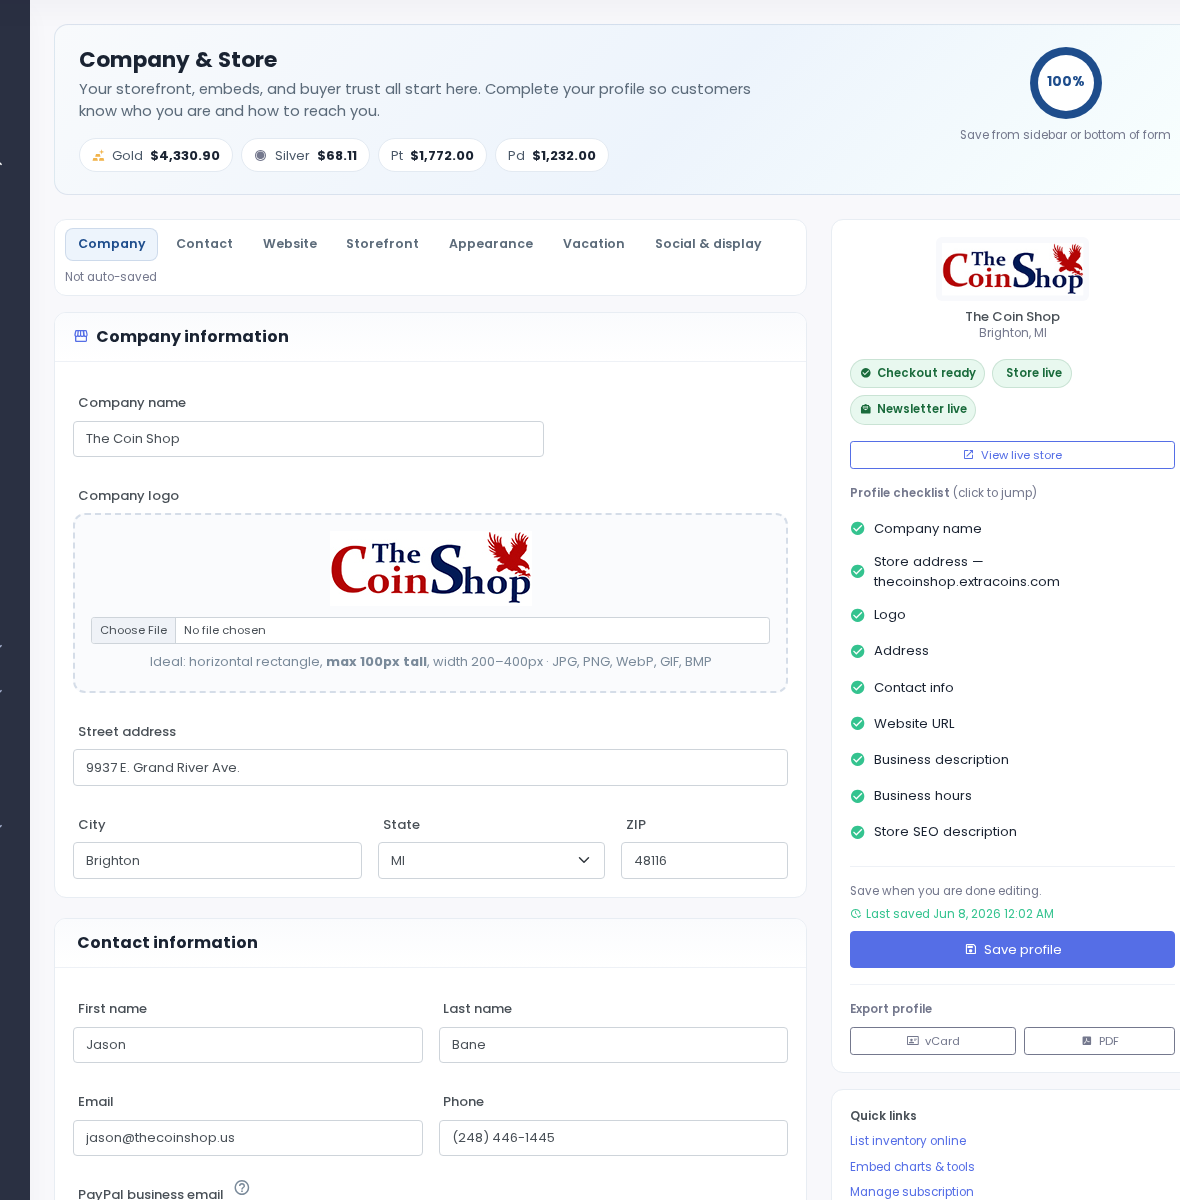
Configuration → Company Profile. 3 Apps section
Under Apps: Sales Checkout (ring up sales), NumisNexus (buy from customers), Greysheet Lookup (collectible guide values), Price Check QR (customer barcode price signs), Staff Quick Cart QR (staff phone list → checkout), and Staff Quick Cart (open the running cart). See Counter Sell Price Tools.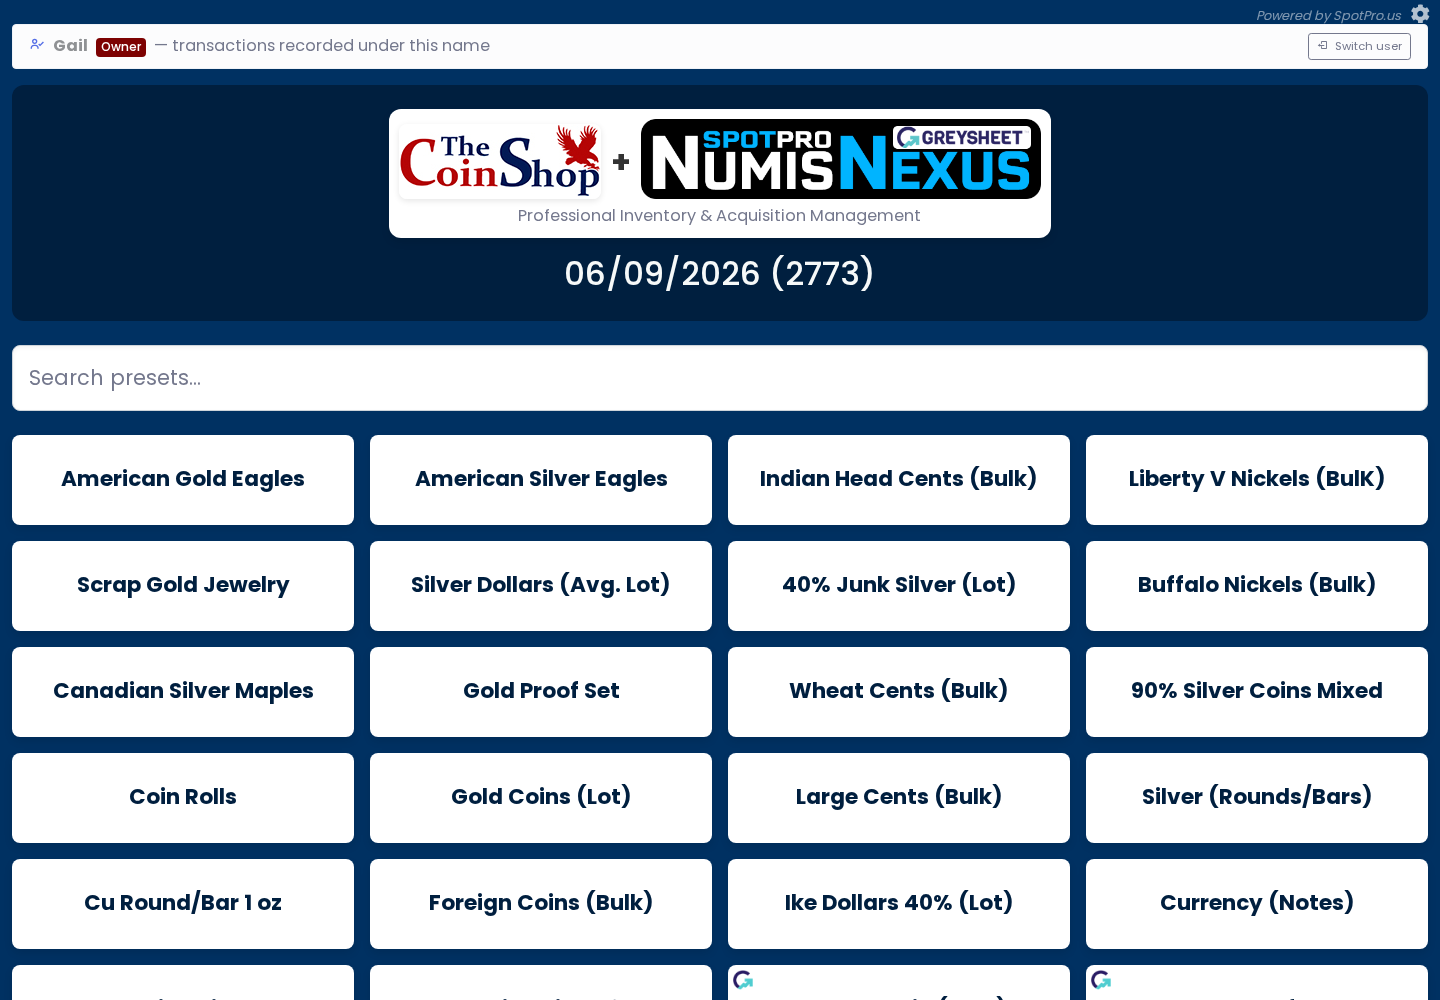
Apps — checkout, buying, lookups, and counter QR tools. 4 Point of Sale section
Click Point of Sale to expand the full POS submenu: Dashboard, Inventory, Import, Tag Sheets, Tag & Scan, New Item, Labels, Reports, Stock Purchases, Staff, and POS Config.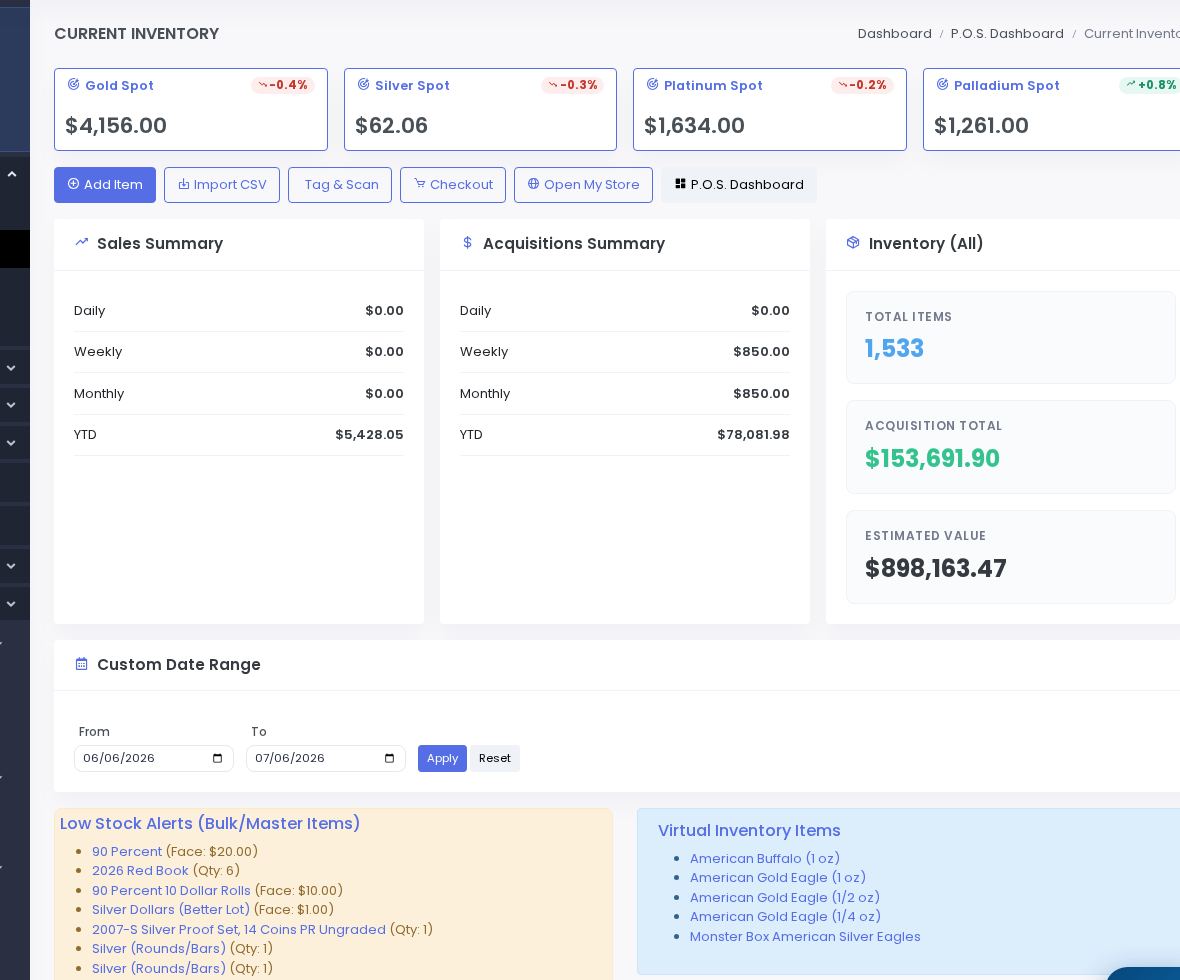
Point of Sale → Current Inventory. 5 Ecommerce section
After you set a subdomain in Company Profile, Ecommerce appears with: Open My Store, Online Listings, New Listing, Orders, and Customers.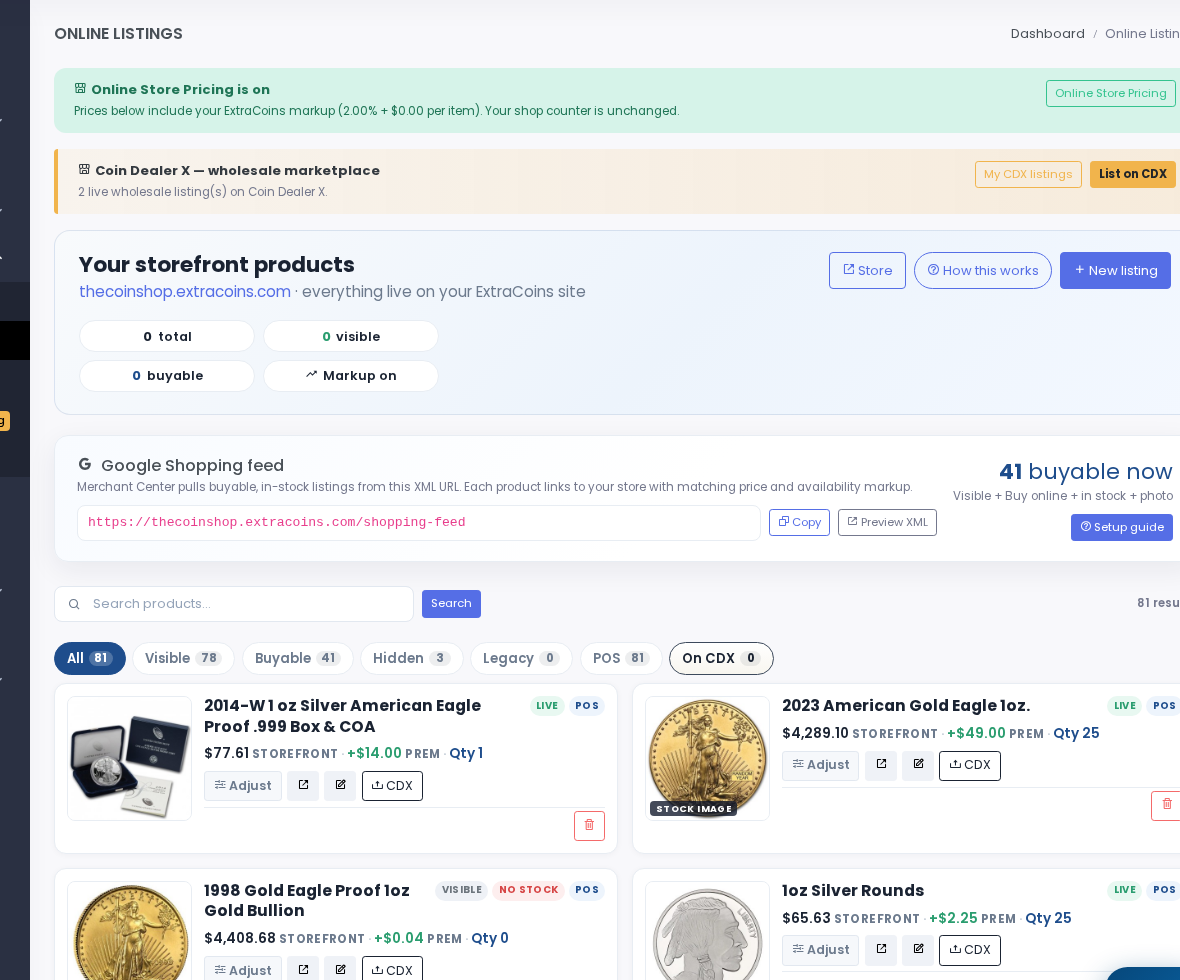
Ecommerce → Online Listings (after subdomain setup). 6 Display Screen and Buy Sheet links
Below Ecommerce, direct links open your live Display Screen and Buy Sheet in a new tab. Copy embed URLs from Configuration → Web Designer Tools for your website.
Display Screen — customer sell prices. 7 Messaging section
Click Messaging to expand. Choose Send Notifications for text blasts or Manage Subscribers for your opt-in list.8 Help links at the bottom
Help Center opens docs.spotpro.us. F.A.Q. has quick answers. What's Live is the in-app feature tour with screenshots. Report a Bug sends issues to support.9 Account section
At the very bottom, Subscription under Account shows your billing and plan. Click your username in the top-right header for Company Profile and logout.