Purchase Presets — Junk, Bullion & Scrap
The ~30 starter buttons in NumisNexus and Buy Sheet — edit premiums, reorder, and toggle TV visibility.
Open POS Config → Opens your members area in a new tab
Step-by-step instructions
1 Open POS Config
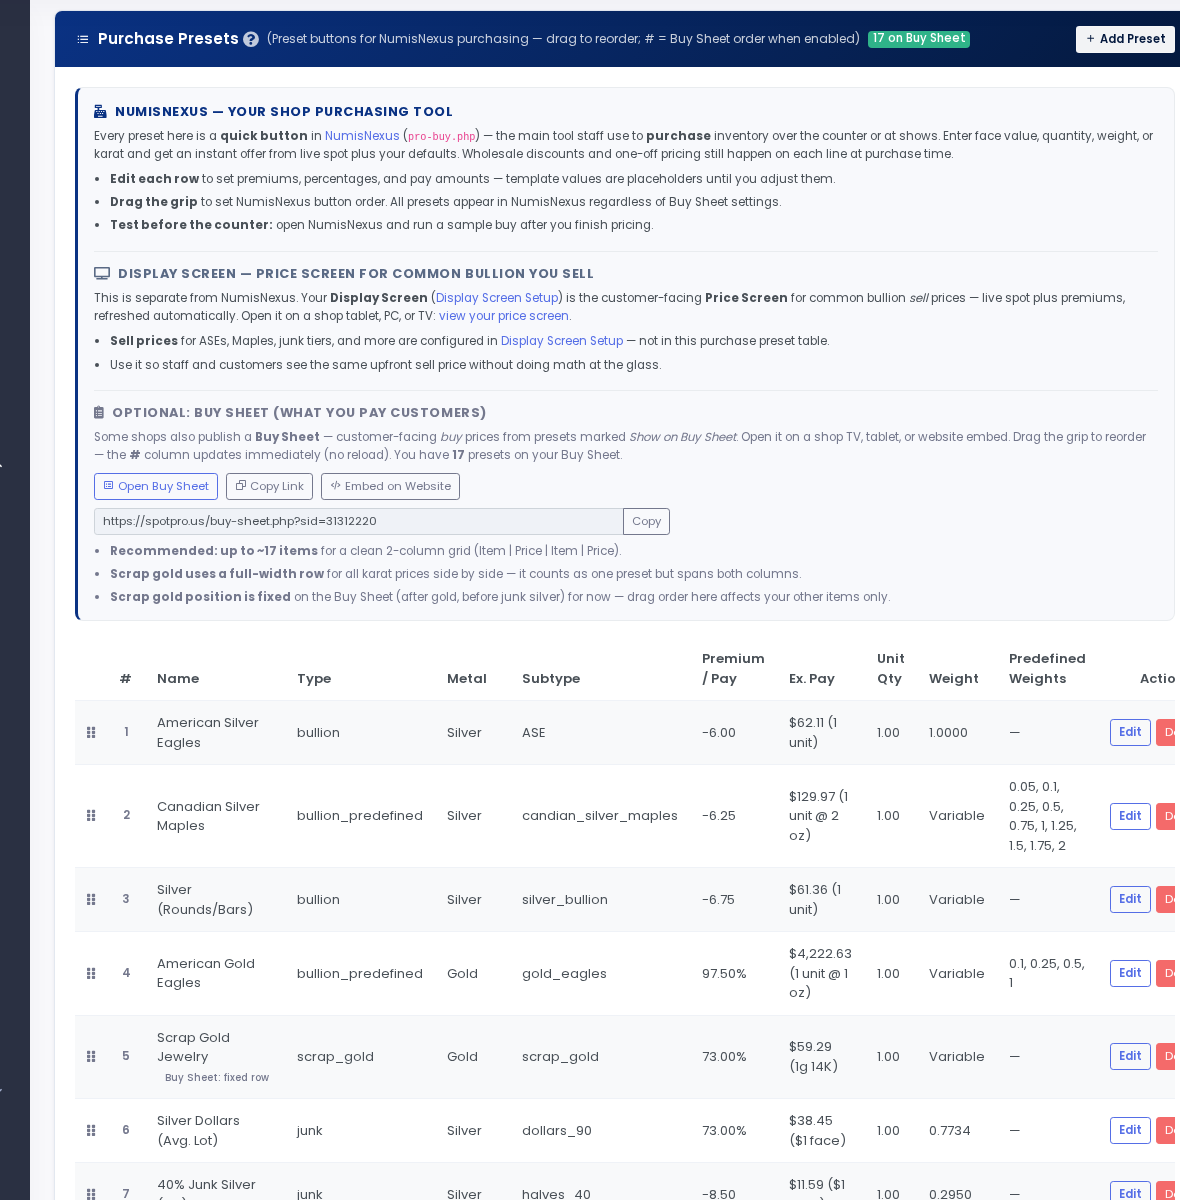
In the left sidebar, click Configuration → Point of Sale Config. Scroll down until you see Purchase Presets.Purchase Presets section with draggable rows. 2 Review the starter presets
SpotPro ships about 30 presets: 90% quarters, ASEs, generic silver rounds, proof sets, scrap gold, and more. Scan the list and identify the 10–15 rows your shop uses every day. You can ignore the rest.3 Click a preset row to edit
Click any row to expand it. You will see fields for the display name, buy premium rules, and quantity options. Read the help text next to each field.4 Set buy premiums
In the premium field, type how much you pay over spot (or under for junk silver). For example, enter-10to pay 10% under melt on 90% silver, or2.50to pay $2.50 over spot per ounce on ASEs. Match your shop policy.5 Drag rows to reorder
Grab the drag handle on the left side of each row and drag it up or down. The top rows become the leftmost buttons in NumisNexus. Put your most common buys first — junk silver, ASEs, generic rounds.6 Toggle Buy Sheet visibility
Check Show on Buy Sheet only for rows you want on the customer TV board. Only about 17 fit cleanly on a wide screen — do not turn on everything. Uncheck rows you never advertise publicly.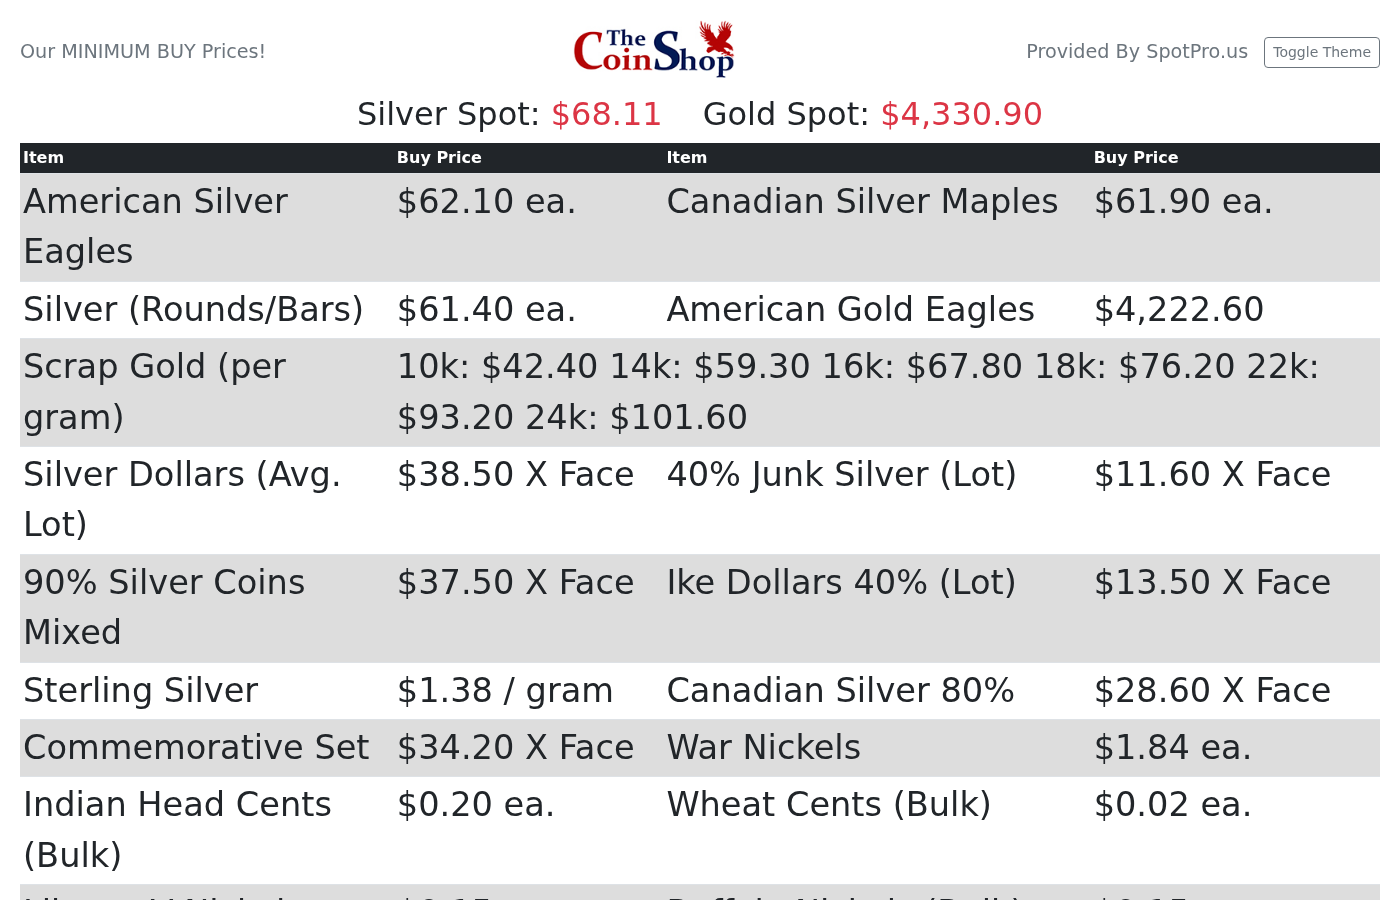
Customer Buy Sheet — shows only toggled-on presets. 7 Preview NumisNexus buttons
Open Apps → NumisNexus in a new tab. The preset buttons across the top should match your reordered list. If not, go back to POS Config and click Save again.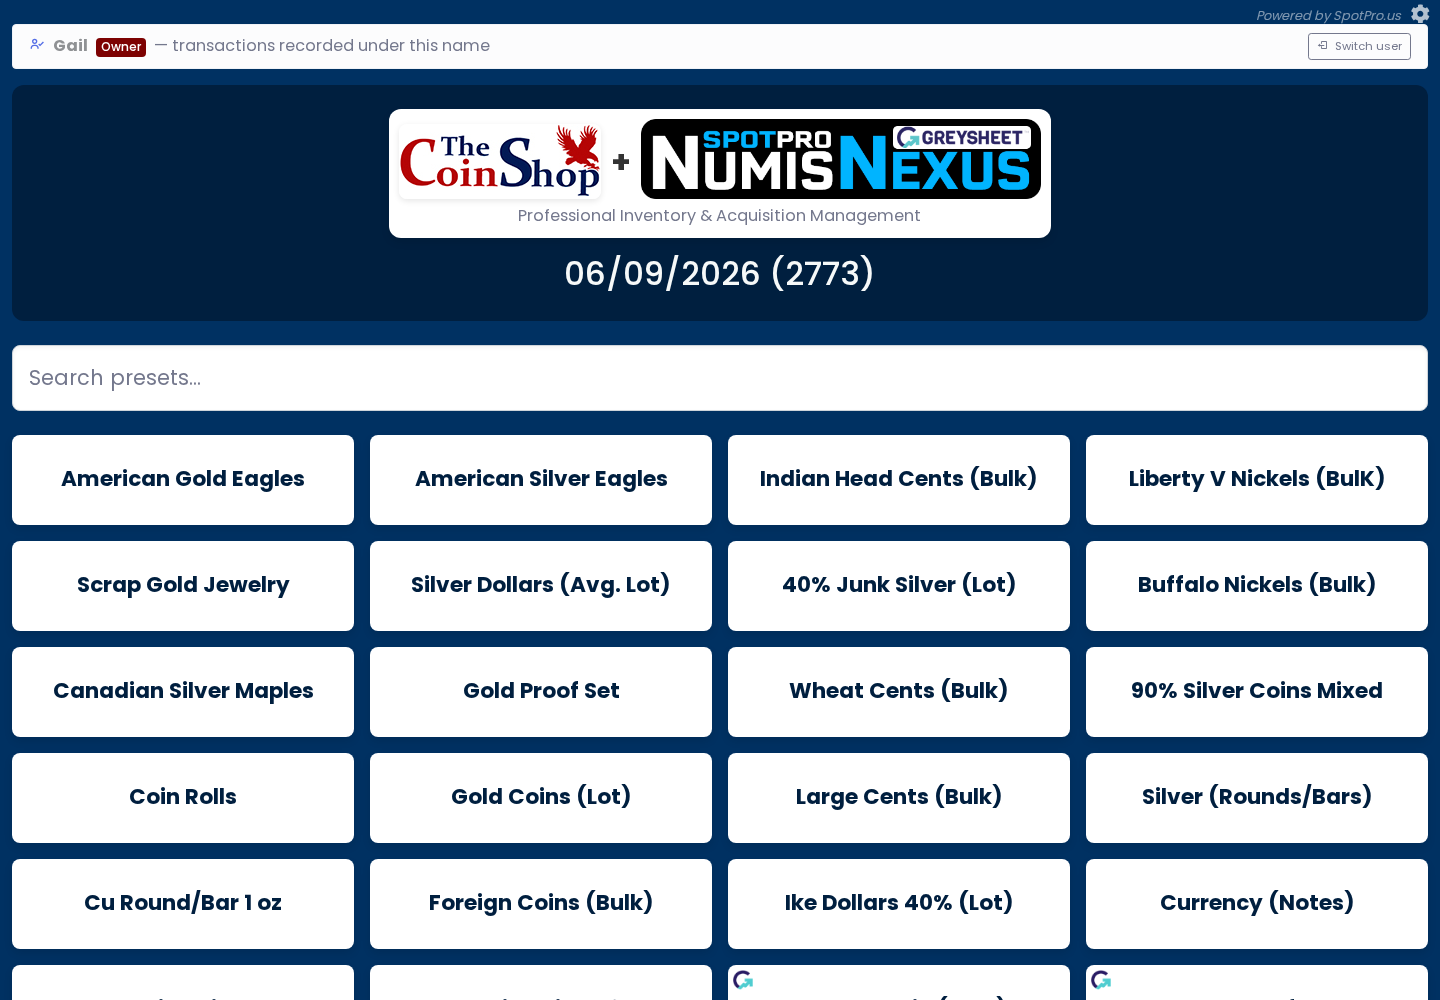
Preset buttons reflect your POS Config order. 8 Click Save
Return to POS Config. Scroll to the bottom of the Purchase Presets section and click Save. NumisNexus buttons and the Buy Sheet update immediately — no page refresh needed on the TV.9 Configure sell premiums separately
Display Screen sell premiums are configured separately. In the left sidebar, click Configuration → Display Screen to set what you charge customers for bullion. Purchase presets control what you pay.
Screenshots