NumisNexus — Professional Buying Overview
Your counter and show-table buy tool. Live spots, presets, receipts, professional estimates, and inventory flow.
Open NumisNexus → Opens your members area in a new tab
Step-by-step instructions
1 Know when to use NumisNexus
Use NumisNexus whenever your shop buys from a customer — junk silver, bullion, scrap gold, proof sets, slabs, estate lots, etc. This is a staff-only screen, not a customer display. Never put this URL on a shop TV.2 Open NumisNexus
In the left sidebar, click Apps → NumisNexus. The register opens in a new tab. Alternatively, from Point of Sale → Stock Purchases, click Open NumisNexus.Apps → NumisNexus in the sidebar. 3 Enter your staff PIN
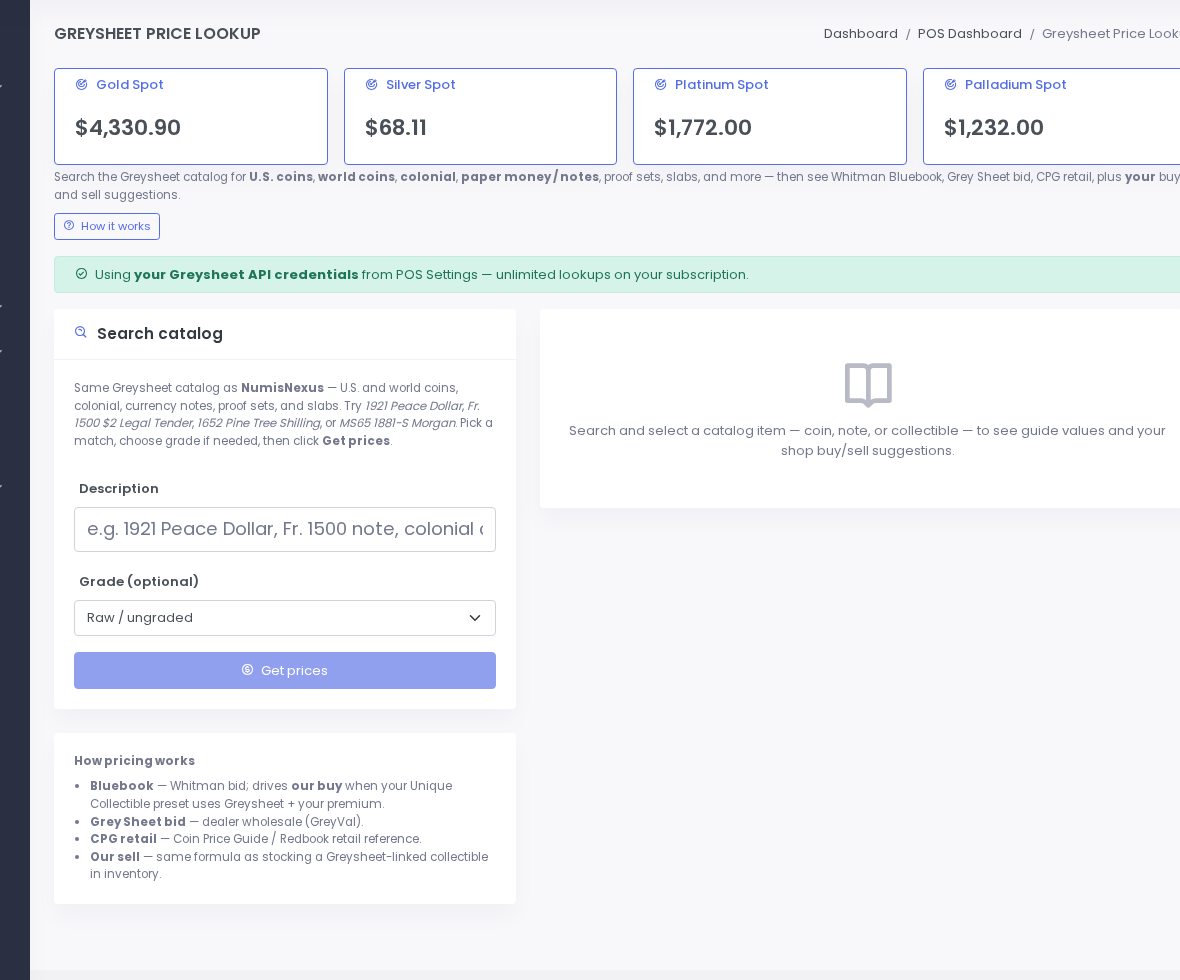
If staff PIN is enabled, a lock screen appears. Type your 4-digit PIN and press Enter. The register loads with live spot chips across the top.4 Read the live spot chips
Gold, silver, platinum, and palladium prices display as chips at the top. They update from Kitco about every 5 minutes. Your offer calculations use these live numbers automatically.5 Start a buy session
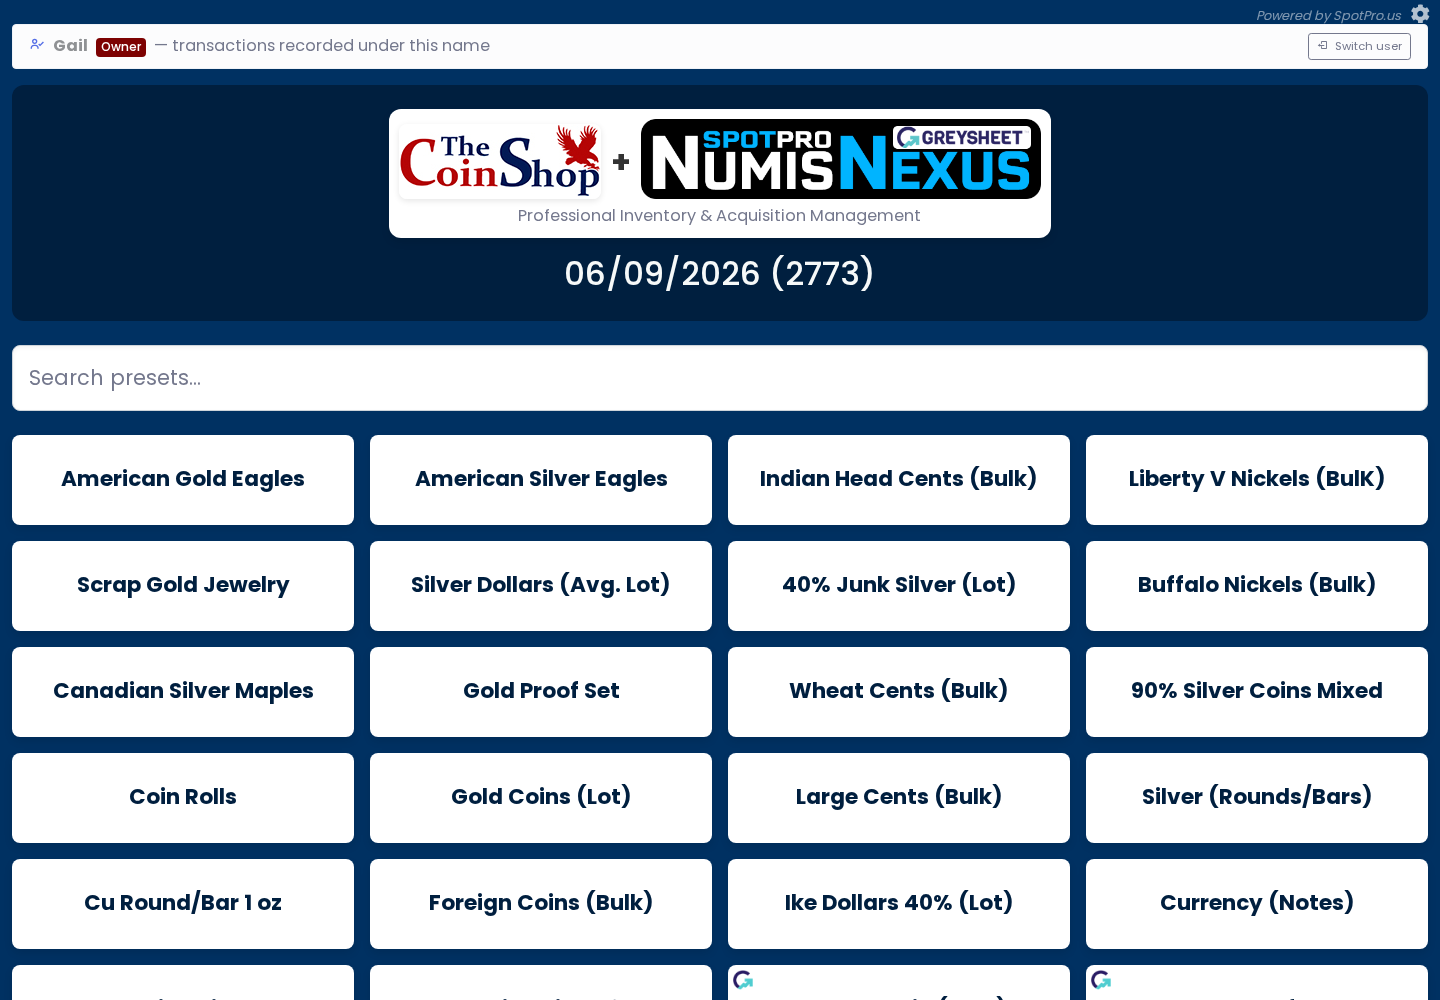
Each buy gets a unique code like PUR-20260609-0001 shown at the top of the screen. One session per customer visit. Finalize or cancel before starting the next customer.6 Pick the venue (store or show)
In the finalize panel, choose a Venue from the dropdown — your shop or an active coin show you added in POS Config → Shows & Venues. SpotPro remembers your last choice. See Shows & Venues to add bourse locations.7 Tap preset buttons to add lines
Click a preset button across the top — 90% Quarters, 1 oz Silver Eagles, Scrap Gold, etc. A form opens on the right asking for quantity, weight, or face value.8 Review the offer total
As you enter details, the offer total calculates from live spot plus your preset rules from POS Config. Adjust the paid amount if you negotiated a different price with the seller.9 Point customers to the Buy Sheet
If you have a Buy Sheet TV, customers see the same buy prices you quote. The Buy Sheet pulls from the same presets — edit premiums once in POS Config.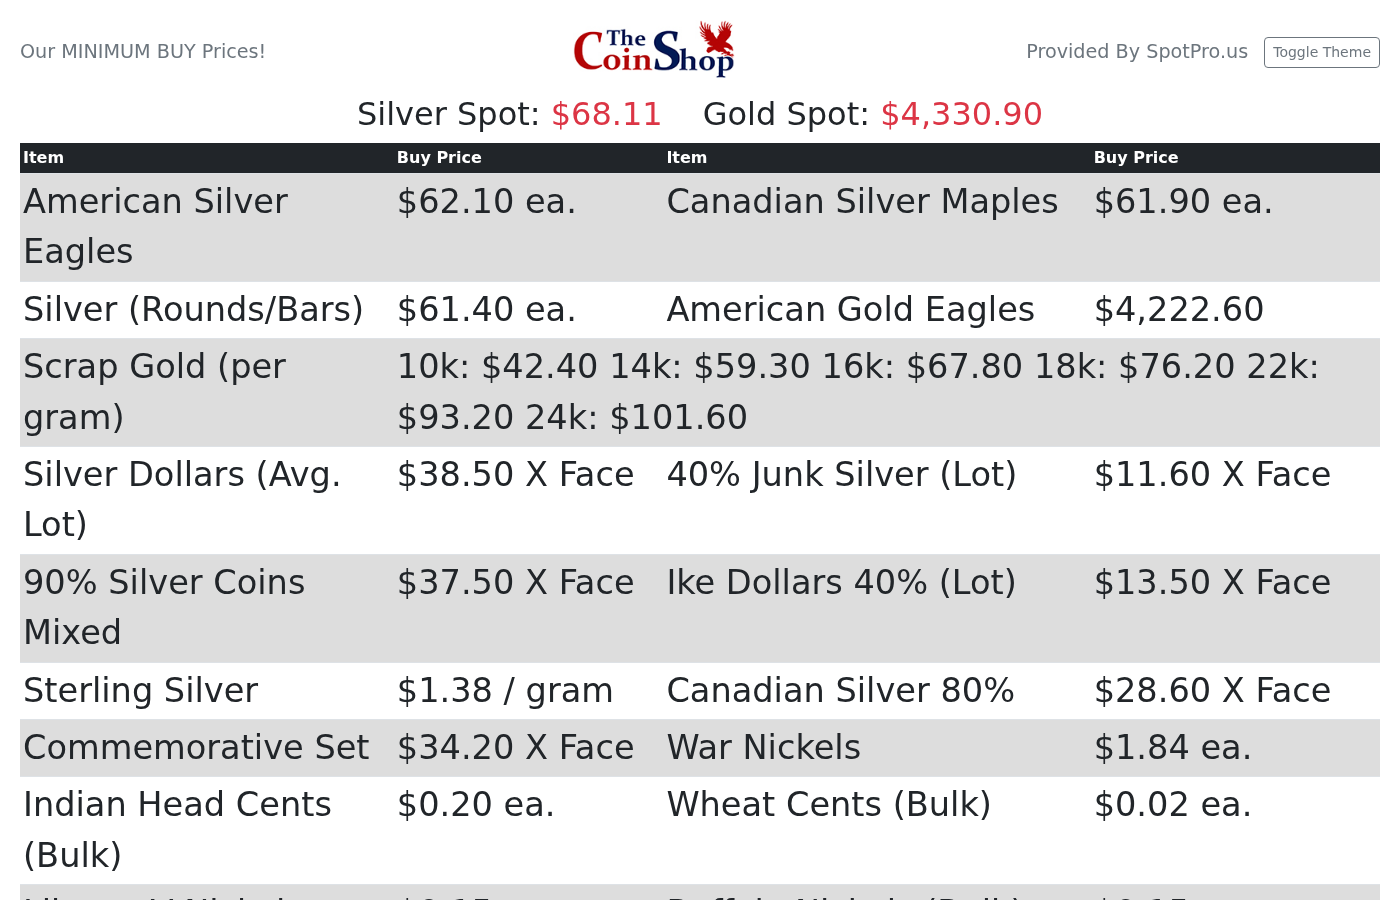
Buy Sheet shows customer-facing buy prices. 10 Finalize and print
When all lines are added, scroll to the bottom. Choose Finalize Purchase, Finalize & Print Receipt, or Save as Estimate. See the receipts article for all three options.11 Stock into inventory
After finalize, open Point of Sale → Stock Purchases. Click Stock on each line to create inventory items with barcodes. The full buy-to-sell loop is complete.
Screenshots