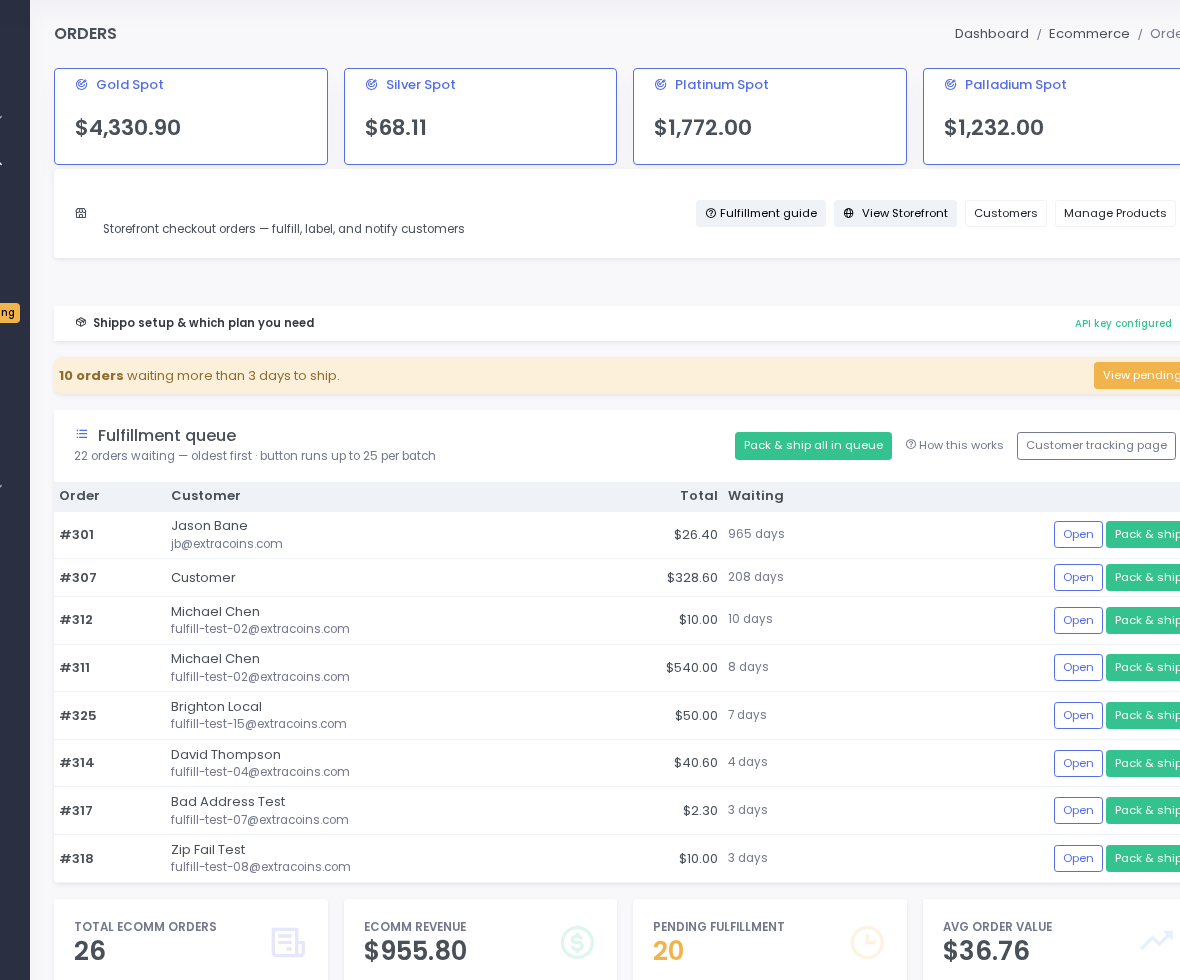
Manage Orders — Shippo, Labels & Tracking
Fulfill web orders with fraud hints, Shippo labels, and customer tracking emails.
Open Orders → Opens your members area in a new tab
Step-by-step instructions
1 Open Orders each morning
In the left sidebar, click Ecommerce → Orders. Check the pending count badge. Click the Pending tab to see orders that arrived overnight.Start each day with the Pending orders tab. 2 Review risk indicators
On each order row, look for fraud hint flags — address mismatches, high-value first-time buyers, or unusual ship-to locations. Click the order to see full billing and shipping details side by side.3 Research before shipping bullion
For bullion orders over your comfort threshold, verify the customer: check Ecommerce → Customers for order history, search the address online, and confirm billing matches shipping.4 Pick and pack the order
Pull each coin from inventory. Mark line items as picked on the order detail page. Pack with appropriate protection — rigid holders for slabs, discreet outer packaging for bullion.5 Click Buy Label
On the order detail page, click the Buy Label button. Shippo rate quotes appear for USPS Priority, First Class, FedEx, and UPS based on package weight and destination.6 Select a shipping service
Click the rate you want — most coin shops use USPS Priority Mail for insured shipments. Confirm the ship-from address matches your shop (configure ship-from name in Shippo settings if needed).7 Purchase and print the label
Click Purchase Label. A 4×6 thermal label generates. Click Print to send it to your label printer. Affix the label to the package.8 Batch print multiple labels
To fulfill several orders at once, select multiple pending orders using checkboxes. Click Batch Print Labels to print all labels in one run.9 Mark Shipped
After the package is handed to the carrier, click Mark Shipped on the order. The status changes to Shipped and the customer receives a branded tracking email (if SMTP is configured in POS Config).10 Reprint a label if needed
Open a shipped order and click Reprint Label if you need another copy. The tracking number stays the same — you are not charged twice.11 Review customer history
Click Ecommerce → Customers to see repeat buyers, total spend, and order frequency. Use this when deciding whether to approve a flagged order from a known good customer.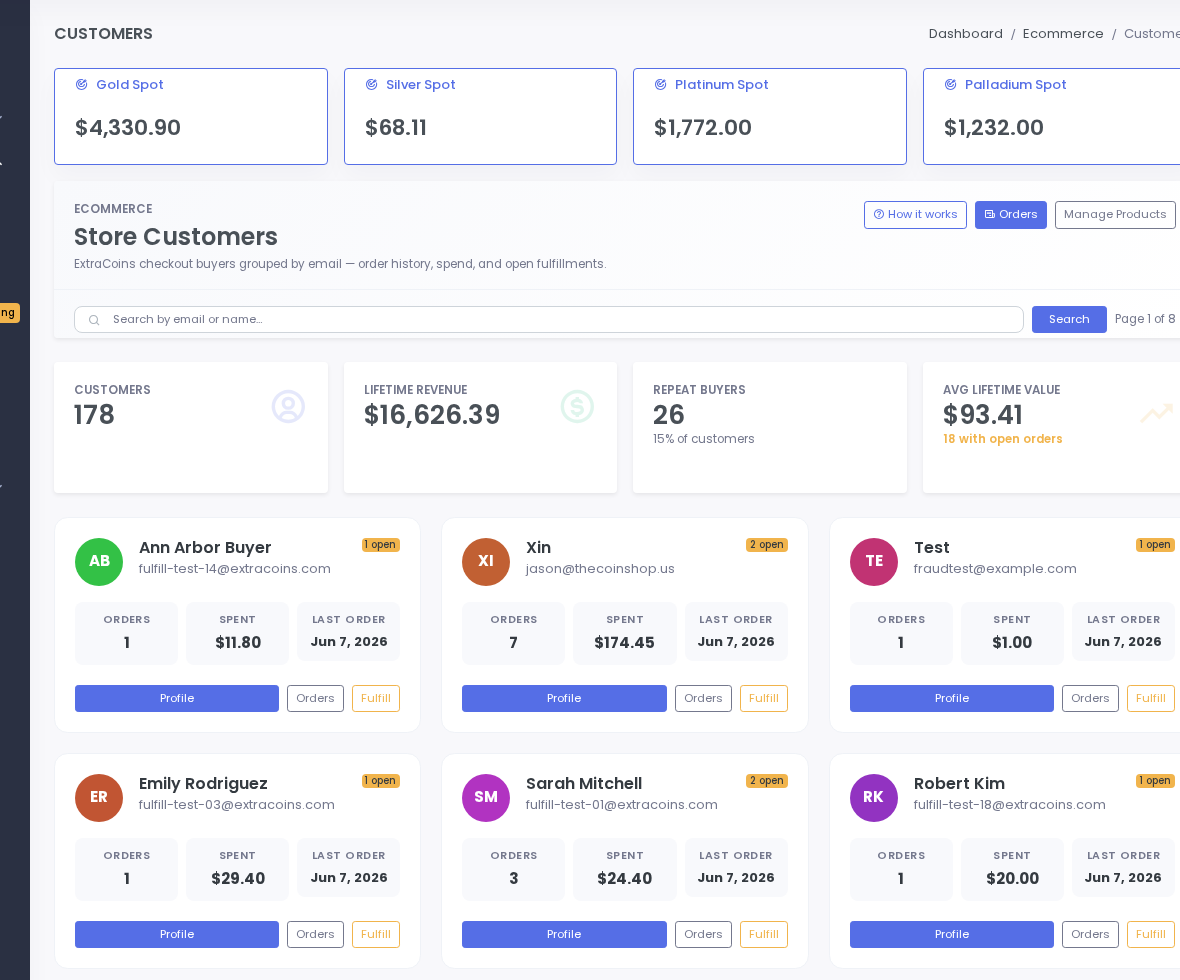
Customer profiles with order history.
Screenshots