POS Configuration Overview
Set up tax, payment methods, receipt printers, and register behavior before your first sale.
Open POS Configuration → Opens your members area in a new tab
Step-by-step instructions
1 Log in to SpotPro
Open spotpro.us/members in Chrome on your register computer. Sign in with your shop owner email and password. You will see your dashboard with spot prices and quick links.2 Open POS Config in the left sidebar
In the left sidebar, click Configuration to expand the menu. Click Point of Sale Config. The POS Configuration page loads — you will see stacked sections for tax, payments, receipts, Greysheet, and purchase presets.Configuration → Point of Sale Config in the sidebar. 3 Review the page from top to bottom
Scroll slowly through the entire page before changing anything. Note which sections have a yellow Update badge — those need attention before you go live. Read the short help text under each heading.4 Complete Tax Settings first
Scroll to Tax Settings. Type your combined sales tax rate in the box labeled tax percentage (for example, type8.25for 8.25%). Choose whether tax is added at checkout or included in your tagged prices. Click Save at the bottom of that section.5 Enable payment methods
Scroll to Payment Methods. Turn on every tender type your shop accepts: Cash, Check, Credit/Debit, and any custom methods. Pick which method is pre-selected when checkout opens. Click Save.6 Set receipt footer text
Scroll to Buy Receipt Terms and Sales Receipt. Type your return policy or thank-you message in the footer boxes. This text prints on customer receipts. Click Save after each section you edit.7 Configure purchase presets
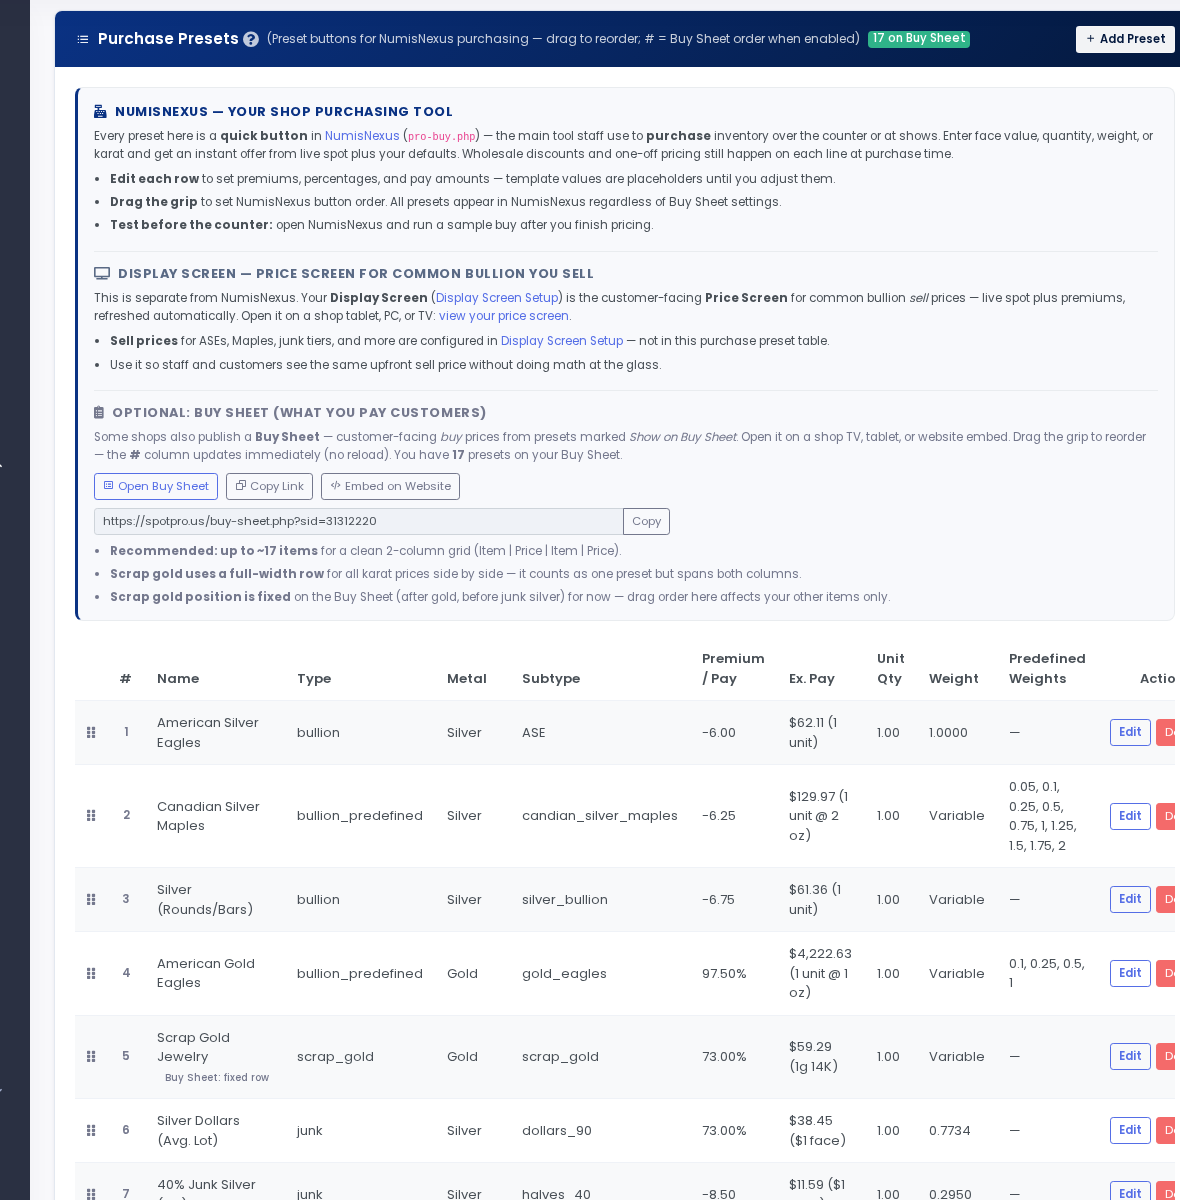
Scroll to Purchase Presets. You will see about 30 starter buttons for junk silver, bullion, scrap gold, and collectibles. Edit premiums on rows you use daily. Check Show on Buy Sheet only for presets you want on your customer TV board.8 Connect Greysheet (optional)
SpotPro includes 50 complimentary Greysheet lookups so you can try values first. When you want unlimited access, scroll to Greysheet API (API Integrations). Log in at greysheet.com, open API Credentials (Dealer+ and Dealer Pro already include access), copy your API Key and API Token, paste them here, and click Save. Skip if you only buy bullion by spot.9 Set up receipt printer (if applicable)
Scroll to Receipt Printer under Hardware. Select your thermal printer from the dropdown. Click Test Print — you should get a short test slip. If nothing prints, install the manufacturer driver first, then try again.10 Add show venues (optional)
If you buy at coin shows or run multiple locations, scroll to Shows & Venues (or open pos_config#venues-section). SpotPro auto-creates a default store venue from your Company Profile. Add show rows for bourse tables so NumisNexus can tag buys by location. See Shows & Venues for the full walkthrough.11 Save and run a test transaction
After each section you change, click Save at the bottom of that section. A green confirmation means settings stored. Open Apps → NumisNexus or Sales Checkout and run a $1 test transaction to confirm tax and receipts look correct.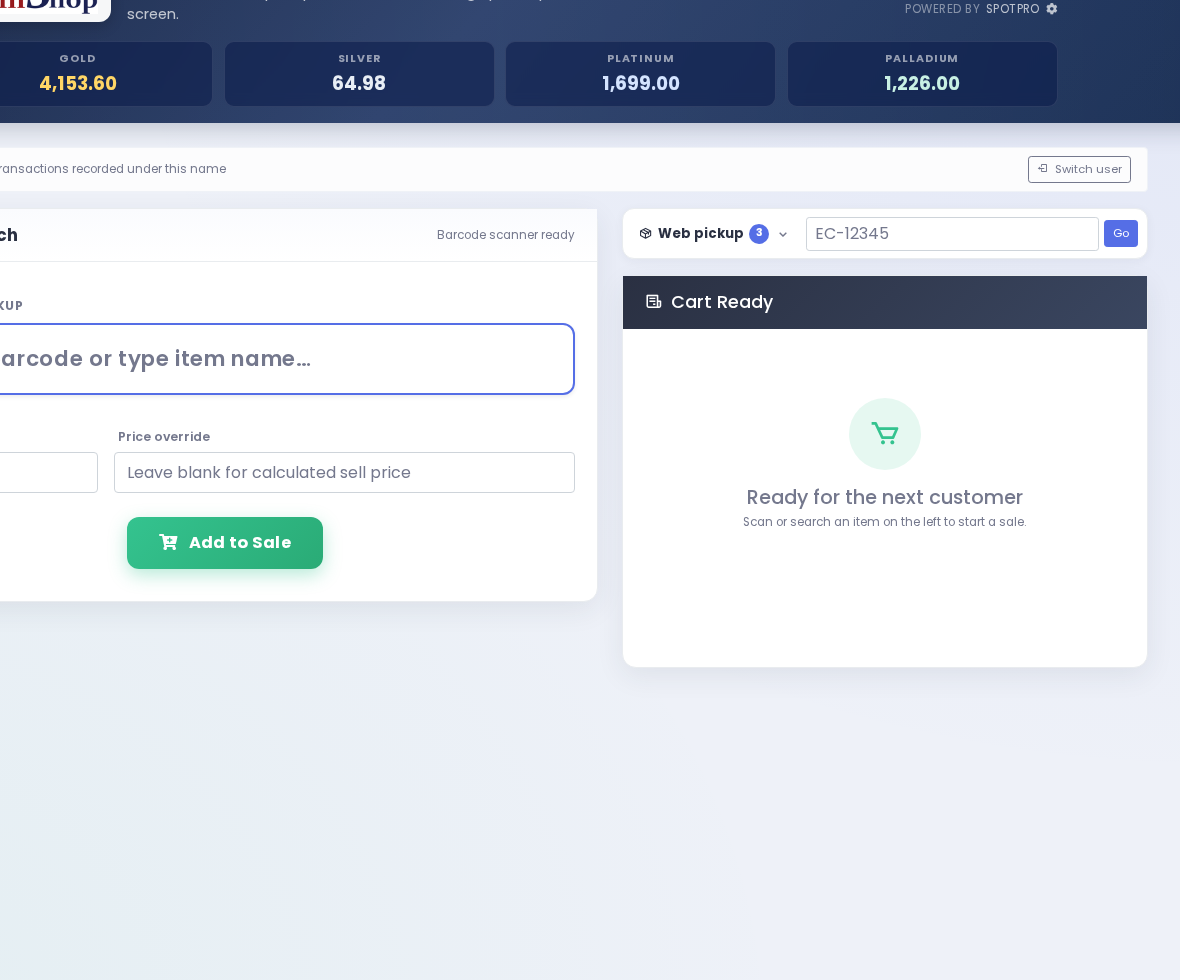
Verify tax and payment options in a real checkout screen.
Screenshots