Sales Checkout Basics
Ring up in-store sales with barcodes, search, discounts, and printed receipts.
Open Sales Checkout → Opens your members area in a new tab
Step-by-step instructions
1 Open Sales Checkout
In the left sidebar, click Apps → Sales Checkout. The checkout screen opens in a new tab — keep this tab open on your counter monitor all day.Apps → Sales Checkout in the sidebar. 2 Enter your staff PIN (if enabled)
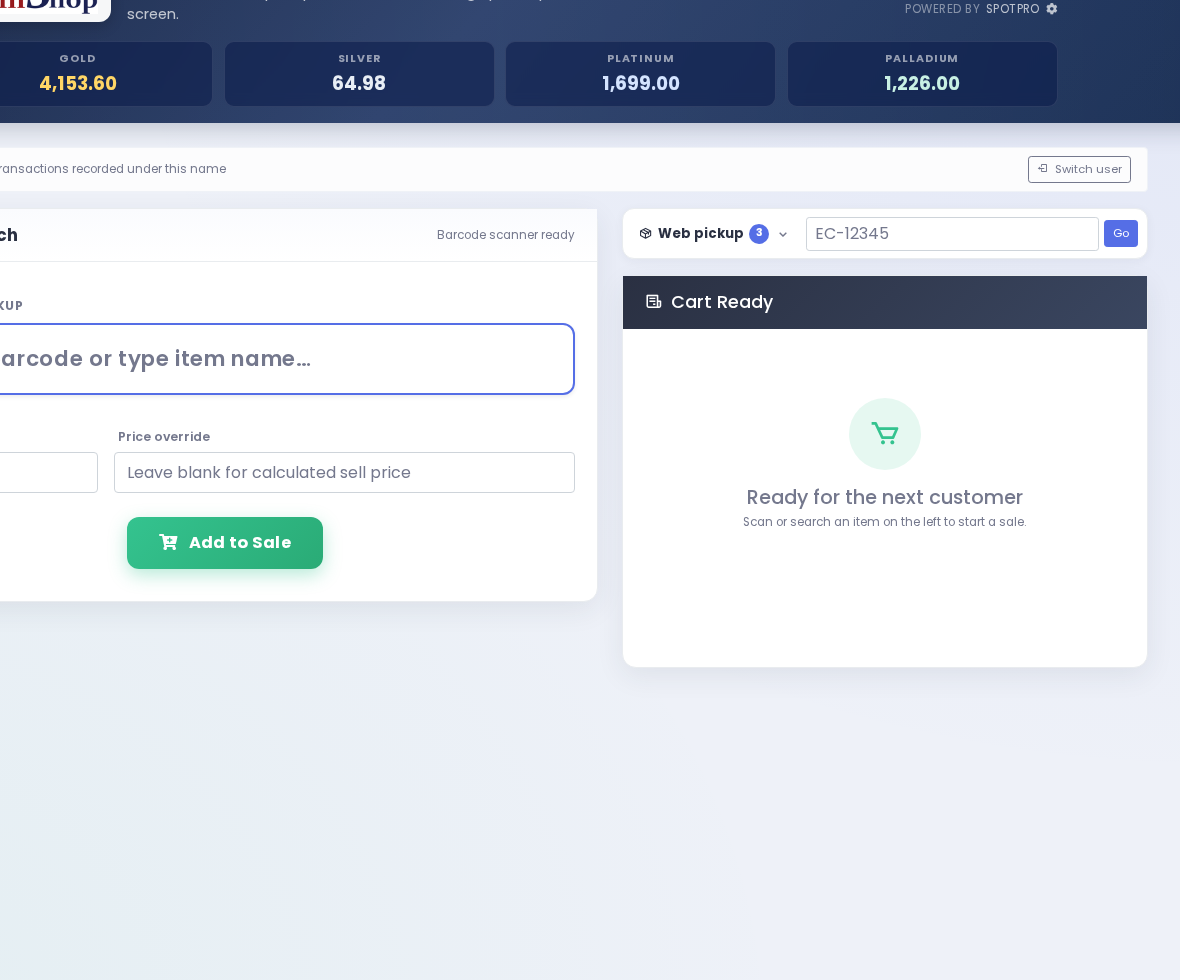
If your shop uses staff PINs, a lock screen appears first. Type your 4-digit PIN and click Unlock. You will see the empty cart with a search bar at the top and the Web pickup bar above it when ecommerce is enabled.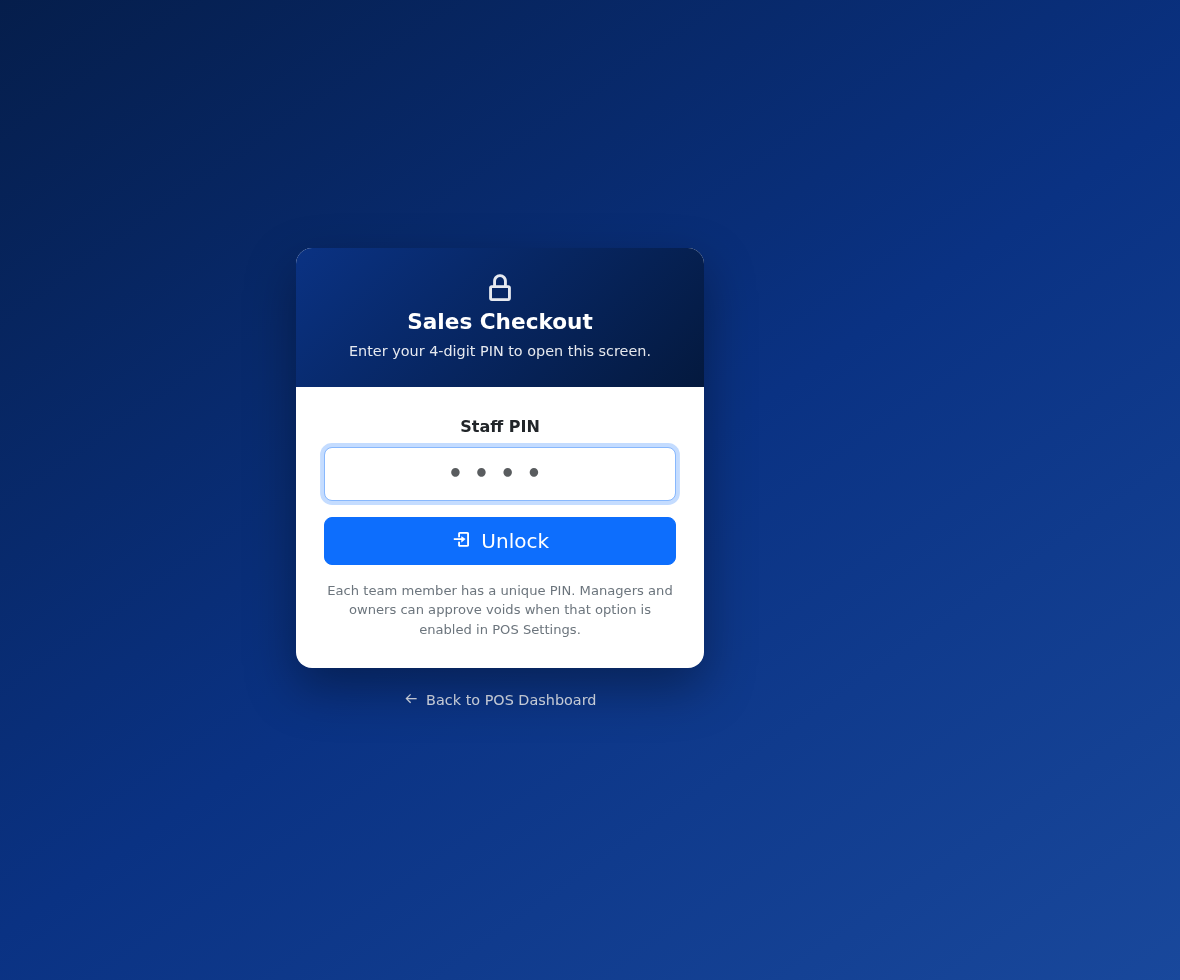
Staff PIN unlocks Sales Checkout. 3 Load a Staff Quick Cart (if sent from the floor)
When staff built a list on a phone with Staff Quick Cart, a blue Quick Cart waiting banner appears above the cart. Click Load Quick Cart — all lines load priced and ready. See Staff Quick Cart.4 Set the sale venue (shop vs show)
Click the venue badge in the header (e.g. In-Store) to pick the correct location, or double-click to cycle venues. See Switch Sale Venue on Checkout.5 Scan a barcode
Point your USB barcode scanner at an item label and pull the trigger. The item appears in the cart automatically with its inventory price. You will hear a beep and see the line added on the right side.6 Or search by keyword
Click the search box at the top. Type a keyword — year, denomination, certification number, or partial title. A dropdown of matching inventory items appears. Click the correct result to add it to the cart.7 Review line items in the cart
Each line shows the item title, quantity, and price. Click the quantity field to change count for multi-quantity items. Click the trash icon on any line to remove a mistake.8 Apply a line discount
Click the price on any line item to override it for this sale only. Type the new price in the box that appears. The original inventory price stays unchanged for future sales.9 Apply a cart-level discount
Look for the discount button below the cart total. Click it and choose percent off or fixed amount off. Staff PIN may be required depending on your POS Config settings.10 Click Finalize Sale
When the cart is correct, click the Finalize Sale button at the bottom. The payment panel opens on the right showing subtotal, tax, and total due.11 Select payment method and complete
Click Cash, Check, or Card. For cash, type the amount tendered in the box labeled amount received — change calculates automatically. Click Complete Sale.12 Print the customer receipt
Your browser opens a print dialog for the customer receipt. Select your thermal printer and click Print. Inventory quantity deducts immediately when you complete the sale. The cart clears for the next customer.
Screenshots