Setup Guide — 15-Minute Walkthrough
Follow the built-in Setup Guide from welcome to your first test buy.
Open Setup Guide → Opens your members area in a new tab
Step-by-step instructions
1 Start the guide from your dashboard
Log in at spotpro.us/members. On your dashboard, click the blue Setup Guide button. Or go directly to index?setup=1. A panel opens on the right with numbered steps and progress tracking.2 Step 1 — Read the welcome
The first step explains what SpotPro includes. SpotPro already loaded starter purchase presets for you. Click Let's go or Next to advance.3 Step 2 — Open Company Profile
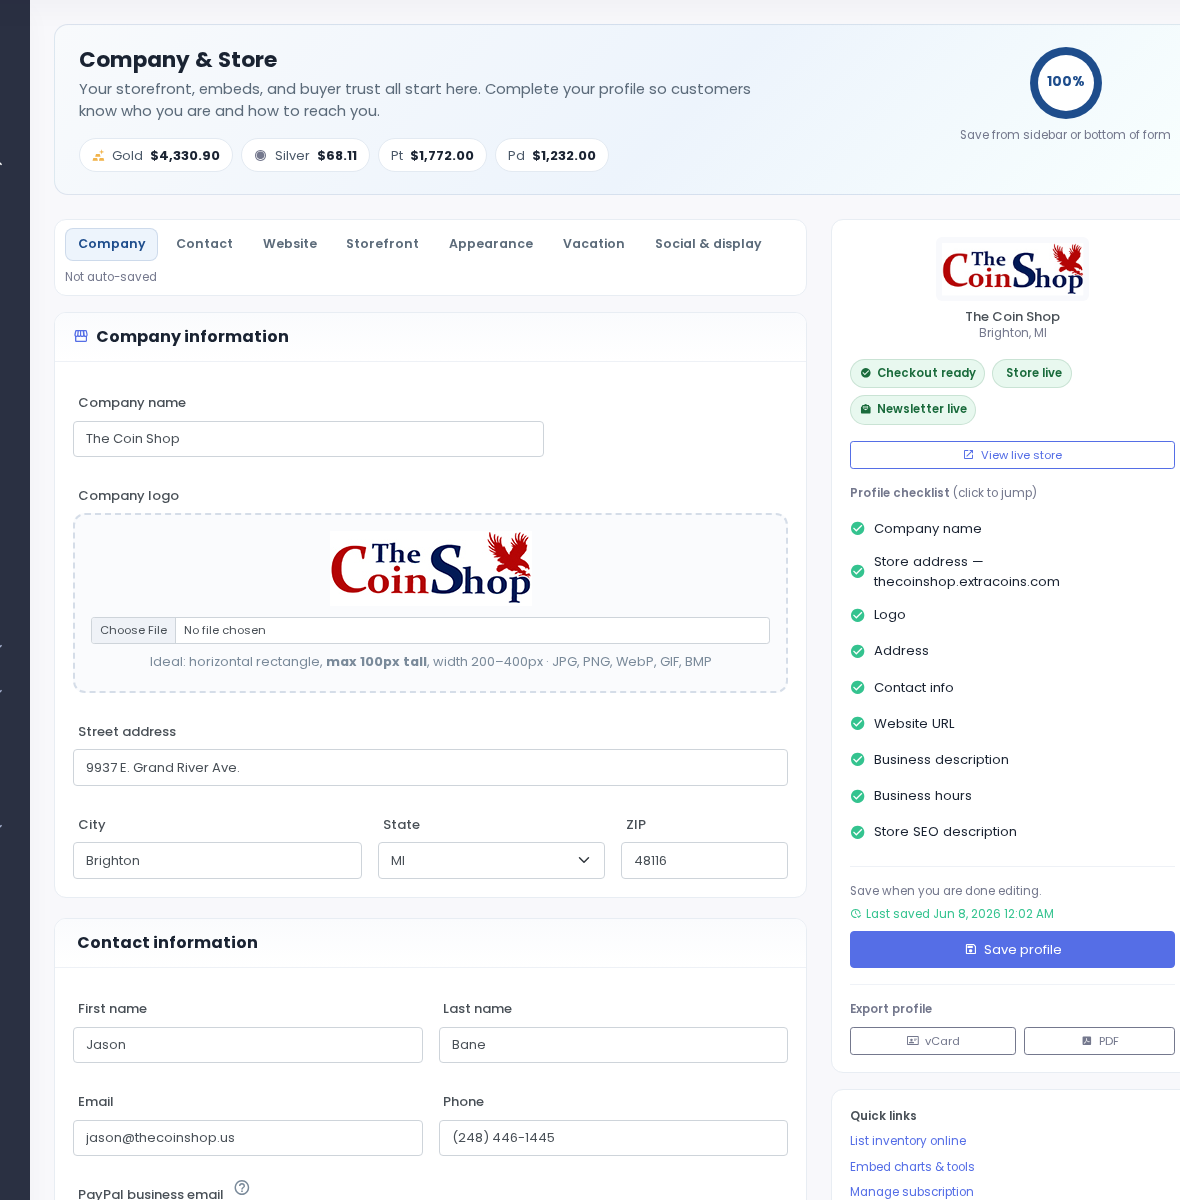
Click the link in the guide to open Configuration → Company Profile. Type your shop name in the business name field. Enter your street address, city, state, zip, and phone number. Upload a logo if you have one.Company Profile — name, address, phone, logo. 4 Mark Company Profile complete
Scroll to the bottom of Company Profile and click Save. Return to the Setup Guide panel and click Mark complete for step 2.5 Step 3 — Configure Display Screen
Click the guide link to open Configuration → Display Screen. Set premiums for bullion you sell — ASE tiers, generic silver, gold Eagles. Enter your premium over spot for each quantity break.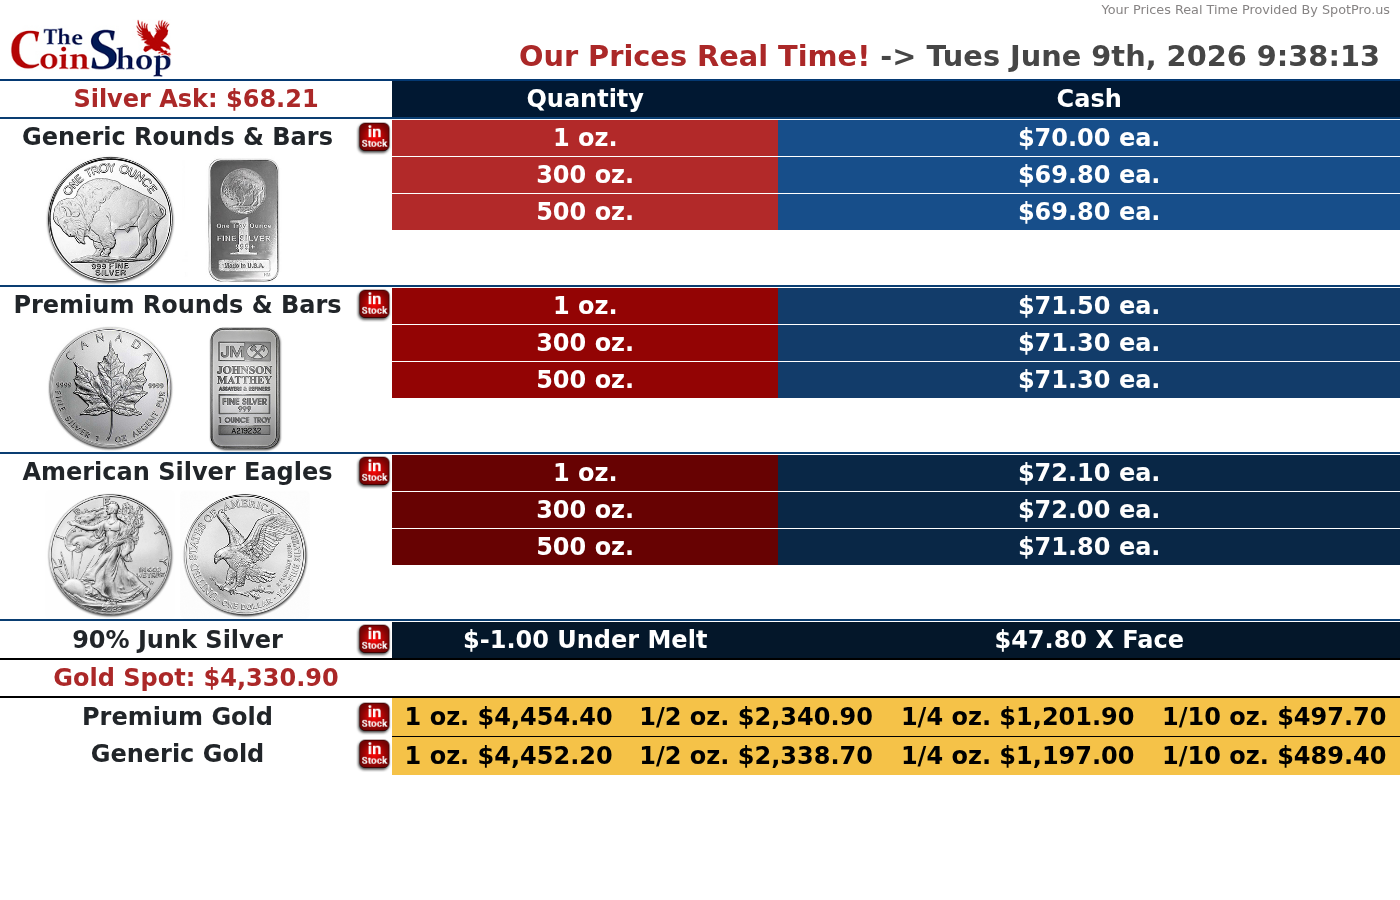
Display Screen — sell premiums customers see on your TV. 6 Preview and save Display Screen
Click the preview link in Display Screen Setup. Glance at it like a customer would — prices should match what you quote across the counter. Click Save. Mark step 3 complete in the guide.7 Step 4 — Review POS Config presets
Open Configuration → Point of Sale Config. Scroll to Purchase Presets. Review the ~30 starter buttons. Edit premiums on rows you use daily. Toggle Show on Buy Sheet for only ~17 items.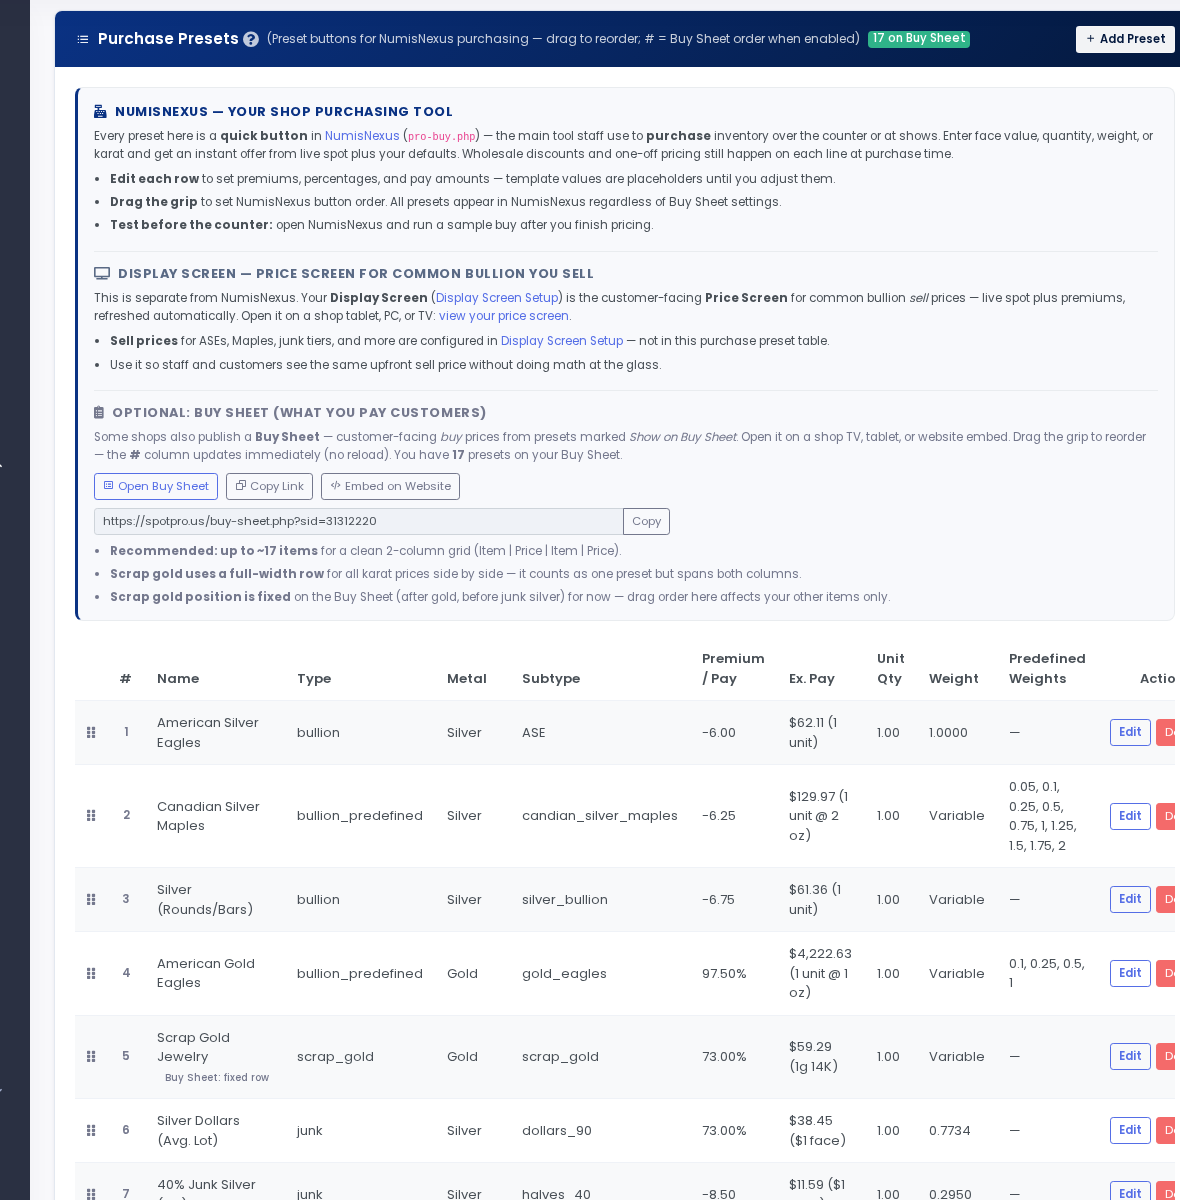
POS Config — edit buy premiums and Buy Sheet toggles. 8 Save presets and mark complete
Click Save at the bottom of Purchase Presets. Mark step 4 complete in the Setup Guide.9 Step 5 — Test buy in NumisNexus
Click Apps → NumisNexus. Tap one preset button (e.g. 90% Quarters). Enter a quantity in the form that opens. You do not need real money — this is practice.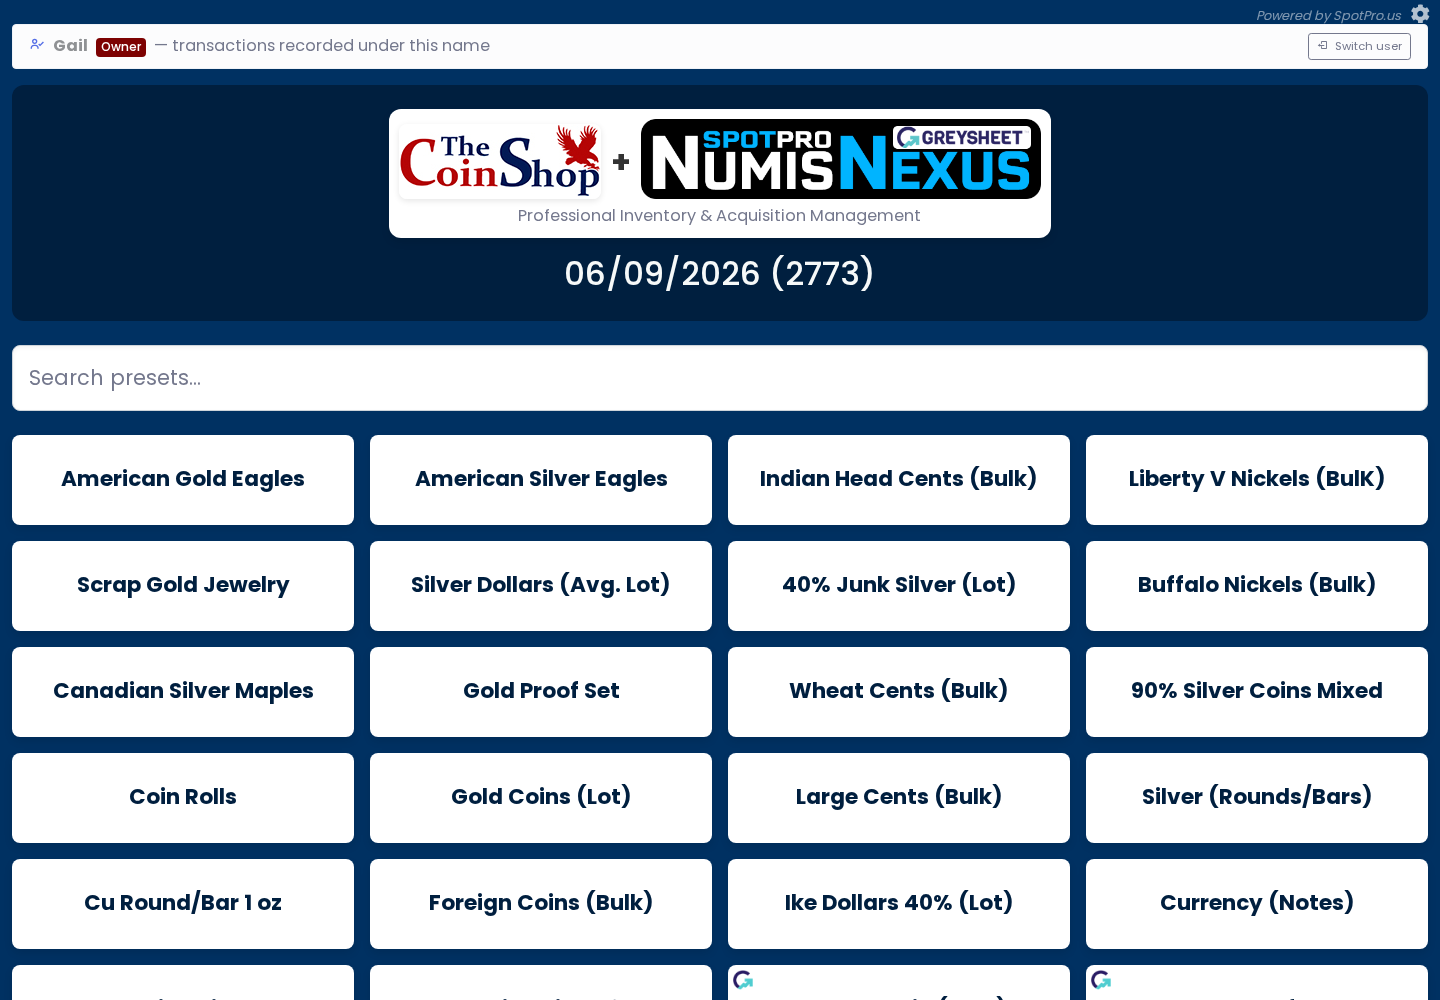
Tap a preset, enter quantity, review the offer. 10 Finalize the test buy
Scroll to the bottom of NumisNexus. Click Finalize Purchase. A Store Copy receipt generates. Mark step 5 complete in the guide.11 Step 6 — Stock into inventory
The guide links to Point of Sale → Stock Purchases. Click your test buy code. Click Stock on one line to push it into inventory with a barcode. Mark step 6 complete — you have closed the full buy-to-inventory loop.
Screenshots